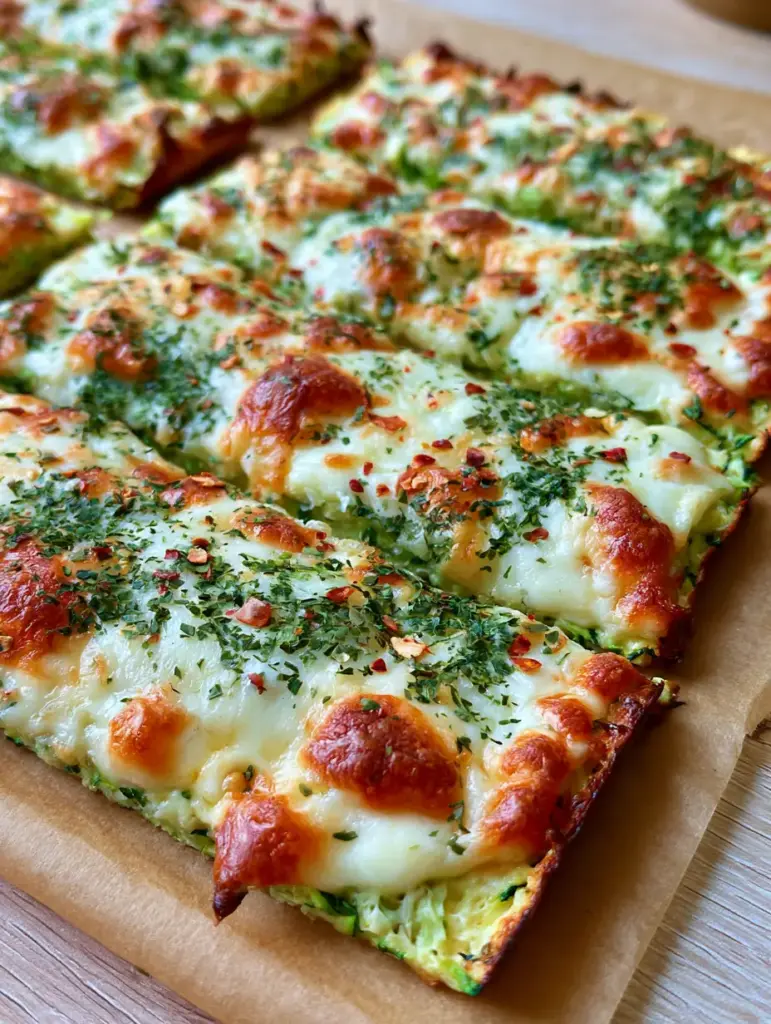
Cheesy Zucchini Breadsticks are the viral, garden-fresh sensation your dinner table has been missing. Imagine a base of shredded green zucchini, baked until the edges are golden-brown and toasted, then topped with a thick, gooey layer of blistered mozzarella cheese. This isn’t just a side dish; it is a handheld masterpiece seasoned with dried oregano flakes and a kick of crushed red pepper flakes.
If you have been looking for a way to use up summer squash that actually tastes indulgent, these Cheesy Zucchini Breadsticks are the answer. We are skipping the heavy dough and focusing on a nutrient-dense base that perfectly mimics the chew of a classic crust. The secret lies in the preparation of the zucchini and the high-heat finish that creates those iconic blistered golden-brown spots on the cheese.
Why You Will Crave These Crispy Zucchini Slices
- The Perfect Crunch: By focusing on golden-brown toasted edges, we ensure these breadsticks aren’t soggy or limp.
- Cheese-Heavy Satisfaction: The thick layer of melted mozzarella provides that classic cheese pull every snack lover dreams of.
- Visual Appeal: Served on rustic brown parchment paper, the contrast of green herbs and red chili flakes makes this a Pinterest-perfect appetizer.
- Low Carb & Gluten-Free: A guilt-free alternative that pairs beautifully with a side of garlic butter pasta for the kids.
Essential Ingredients for Success
To achieve the specific texture shown in our Visual Recipe Blueprint, you need ingredients that balance moisture and structure. Here is what you will need to gather.
Shredded Green Zucchini: This forms the bulk of our “dough.” Use a box grater for medium-sized shreds. It provides the earthy base and vibrant green flecks visible in the final bake.
Mozzarella Cheese: You want a low-moisture, part-skim mozzarella to achieve those blistered spots. Fresh mozzarella contains too much water and will make the base soft.
Large Egg: The invisible glue. The egg proteins set during baking, binding the zucchini shreds into a sturdy, rectangular layer that you can actually hold.
Dried Oregano & Red Pepper Flakes: These aren’t just garnishes; they provide the aromatic profile of a classic Italian pizzeria. The dried green herb flakes offer an earthy depth, while the small red chili flakes provide a gentle heat.
Parchment Paper: Non-negotiable. Without parchment paper, the cheese and zucchini will bond to your baking sheet, and you’ll lose those crispy edges.
The Science of Prepping Zucchini Crust
The biggest mistake home cooks make with Cheesy Zucchini Breadsticks is moisture management. Zucchini is roughly 95% water. If you don’t remove that liquid, you end up with a vegetable mush rather than a breadstick.
After shredding, you must salt the zucchini and let it sit for 10 minutes. Then, use a clean kitchen towel or cheesecloth to squeeze—and I mean really squeeze—the liquid out. You should be left with a dry, compact ball of green shreds. This technique is similar to how we prep for zucchini potato muffins to ensure a consistent crumb.
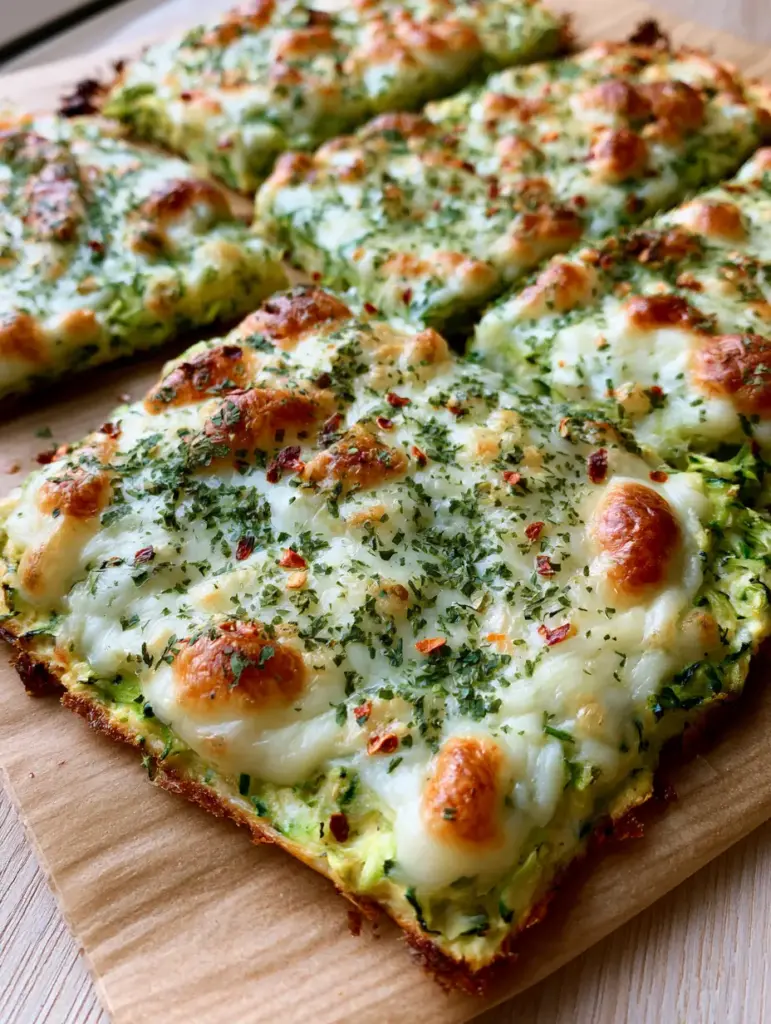
Step 1: Shredding and Dehydrating
Start by grating 4 cups (approx. 500g) of fresh zucchini. Place them in a bowl with a pinch of salt. After 10 minutes, wring them out until no more water drips. This ensures your Cheesy Zucchini Breadsticks stay firm and sliceable.
Step 2: Building the Base
Mix your dry zucchini with one egg, a half cup (50g) of grated parmesan, and a teaspoon of garlic powder. The parmesan adds a salty, nutty flavor that complements the shredded green zucchini base. Press this mixture into a thin, even rectangle on your parchment paper.
Step 3: The Initial Bake
Bake the base at 425°F (220°C) for about 15-20 minutes. You are looking for the edges to become slightly crisp and toasted. The base should feel firm to the touch and have a matte appearance before you add the toppings.
Step 4: The Blistered Cheese Topping
Now, pile on 1.5 cups (170g) of shredded mozzarella. Sprinkle the dried oregano flakes and crushed red pepper flakes generously over the surface. Return to the oven, preferably under the broiler, for 3-5 minutes. Watch closely! You want blistered golden-brown spots to form across the white landscape of cheese.
Expert Tips for Pinterest-Worthy Results
- Uniform Thickness: When pressing the zucchini onto the parchment paper, ensure the edges aren’t thinner than the center, or they will burn before the middle sets.
- Broiler Mastery: Every oven broiler is different. Stay by the oven during the final stage to achieve that perfect handheld smartphone photo look without charring the herbs.
- The Resting Period: Let the Cheesy Zucchini Breadsticks rest for 5 minutes before slicing. This allows the cheese to set and the base to firm up, ensuring clean, rectangular cuts.
- Herb Freshness: While we use dried green herb flakes for baking, a finish of fresh basil can add a pop of bright color.
How to Store and Reheat
If you have leftovers (unlikely!), store them in an airtight container in the fridge for up to 3 days. To maintain the golden-brown toasted edges, reheat them in an air fryer at 350°F (175°C) for 3 minutes. Avoid the microwave, as it will make the zucchini base soft and rubbery.
These also freeze surprisingly well. Layer them between sheets of parchment paper in a freezer bag. You can bake them straight from frozen for a quick lunch that beats any store-bought pizza snack.
What to Serve With Cheesy Zucchini Breadsticks
These breadsticks are incredibly versatile. For a light lunch, pair them with a roasted sweet potato salad or a fresh macaroni salad.
If you are serving these as a starter for dinner, they complement a hearty stuffed chicken breast or a tray of creamy spinach and mushroom lasagna perfectly. The heat from the crushed red pepper flakes cuts through rich, creamy sauces beautifully.
Frequently Asked Questions
Absolutely! With only about 4-6g of net carbs per serving and a high protein content from the cheese and egg, they are a perfect staple for a ketogenic diet.
Yes, you can substitute the egg with a flax egg (1 tbsp ground flax + 3 tbsp water) and use vegan mozzarella and parmesan alternatives, though the blistering effect may vary.
Yes, yellow summer squash works perfectly as a substitute. The texture and moisture content are nearly identical, though the visual ‘green flecks’ will be missing.
The key is using the broiler for the final 3-5 minutes of cooking. Use low-moisture mozzarella and place the tray on the top rack, watching closely to prevent burning.
Sogginess is usually caused by excess moisture in the zucchini. Ensure you salt the shredded zucchini and squeeze it firmly in a kitchen towel to remove all liquid before mixing the dough.
The Best Cheesy Zucchini Breadsticks Recipe
Follow the detailed instructions below to create these stunning, crispy, and cheesy delights. Remember to look for those blistered spots and toasted edges for the best flavor profile!

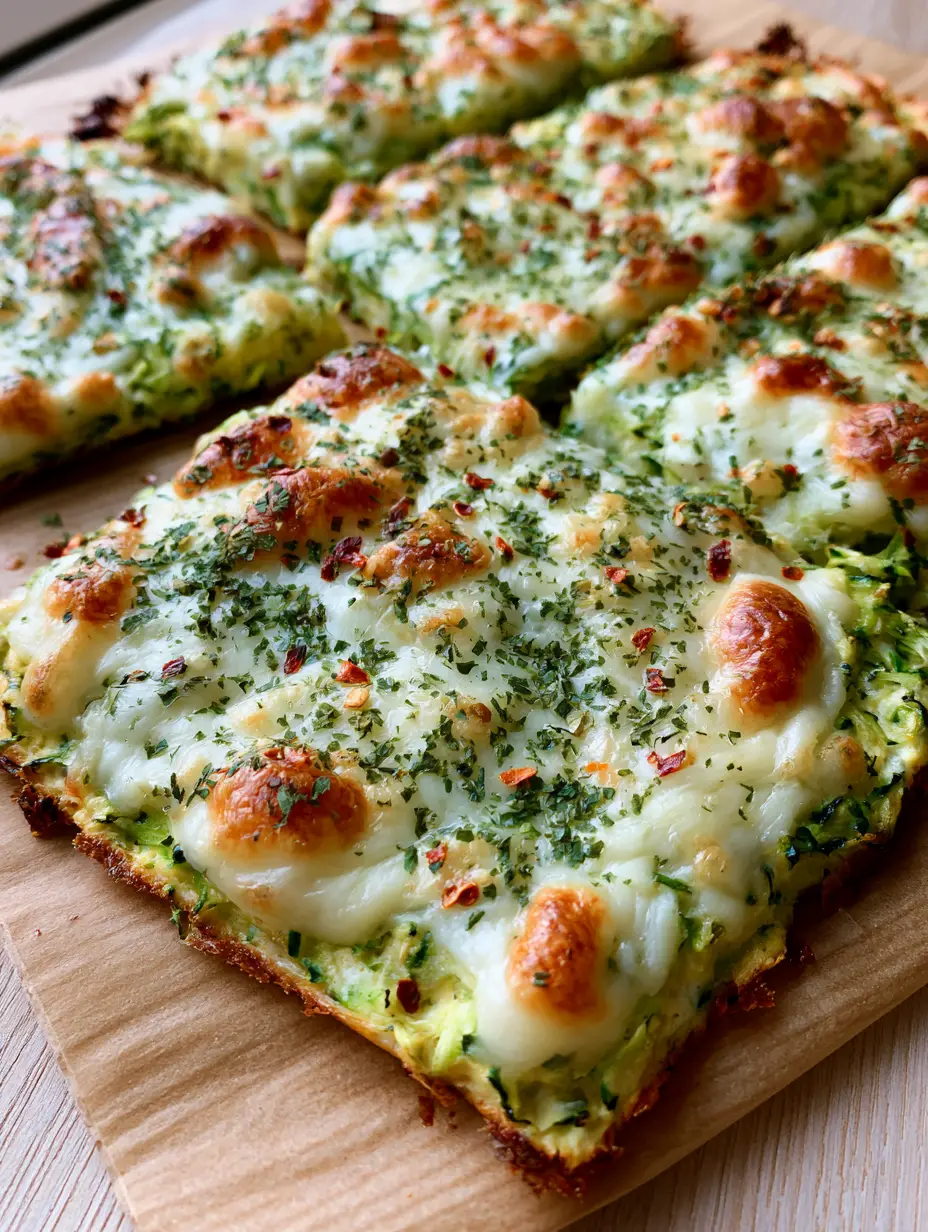
Cheesy Zucchini Breadsticks: The Ultimate Low-Carb Crispy Snack
Ingredients
Equipment
Method
- Shred the zucchini using a box grater. Toss with a pinch of salt and let sit for 10 minutes to draw out water.
- Place zucchini in a clean kitchen towel and squeeze forcefully until no more liquid escapes. You want a very dry ball of zucchini.
- Mix dried zucchini, egg, parmesan, and garlic powder. Press into a thin rectangle on a parchment-lined tray.
- Bake at 425°F (220°C) for 15-20 minutes until the edges are golden-brown and toasted.
- Top with mozzarella, oregano, and red pepper flakes. Broil for 3-5 minutes until the cheese shows blistered golden-brown spots.
Notes
Use a pizza cutter for clean rectangular slices after letting the breadsticks rest.
Join the Savorgrove Community!
Did you make these Cheesy Zucchini Breadsticks? We want to see your results! Save this recipe to your favorite Pinterest board so you never lose it. Follow savorgrove for more garden-to-table inspiration and low-carb hacks. Drop a comment below with a photo of your blistered cheese masterpiece and don’t forget to leave a 5-star rating to help other home cooks find this recipe!